Well, again I have taken way too long to post on my blog but fortunately I waited so long it is now in one of my favorite seasons for desserts! PIES! Pumpkin, Apple and Pecan being my favorite... at least at this time of the year.
I have lots of ideas for pumpkin sweets and conveniently pumpkin does savory very well also.
So now I have to decide which of these recipes you would most likely use and appreciate...hmmmm... I can give you my favorites. I always tell my students to cook or bake what they love to eat and this will ensure your guests will love it too... so heeding my own advice...
Personally I enjoy the flavors of the season but want to have lighter dessers since the meals we usually eat tend to be on the heavy and rich side. I decided that I will share with you my Pumpkin Souffle Roulade with Rum scented cream, Pumpkin Chiffon Pie with graham cracker crust, Apple cranberry gallette, and Maple-Bourbon Pecan Pie.
Some are light and airy while others rich and delicious but all are flavors of the season!
That ought to get your mouth watering :)
First I present my beautiful, light and easy:

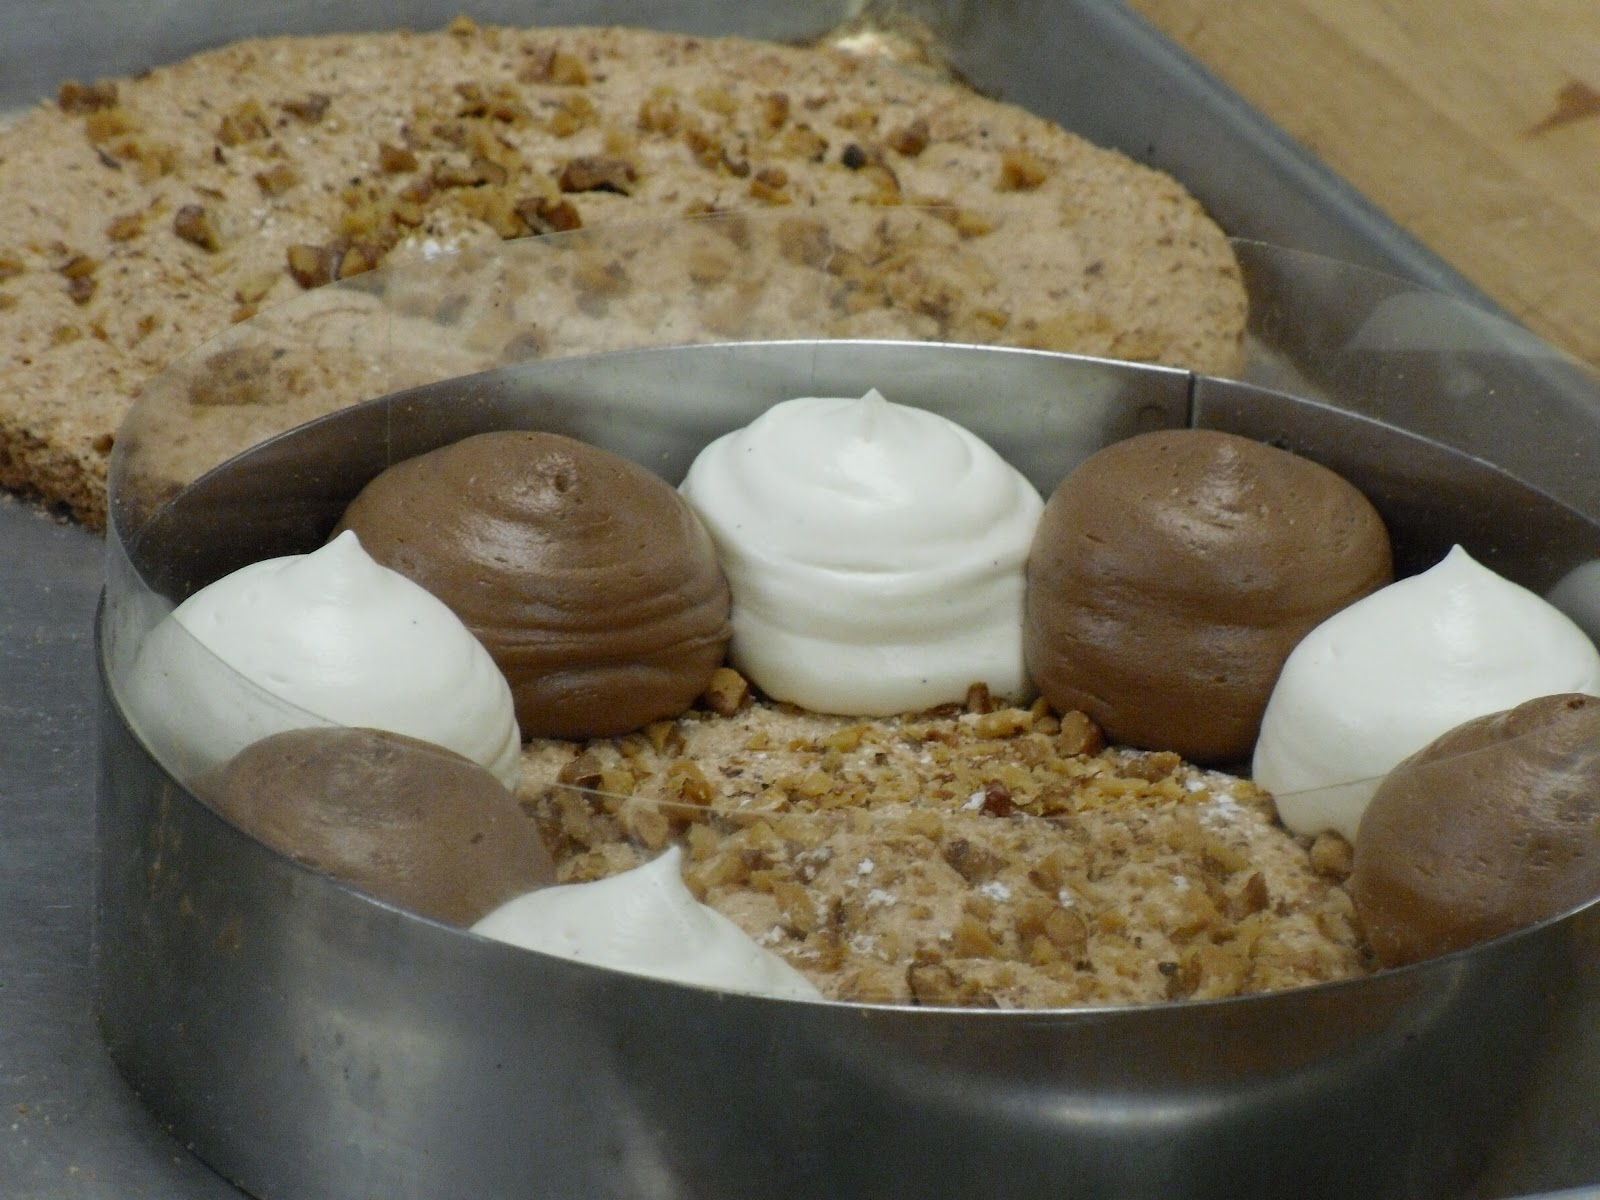
Pumpkin Soufflé Roulade
Prepare a ½ sheet pan measuring 12”x 18” with parchment
paper on the bottom… no need to grease the pan.
Preheat your oven to 375°
In a large mixing bowl, measure out :
1 cup pumpkin puree
8 egg yolks
1 Tablespoon dark rum
2 teaspoon cinnamon
1 teaspoon nutmeg
½ teaspoon ginger
Mix together until smooth.
Then have ready:
8 egg whites
1 cup sugar
pinch of salt
Whip the egg whites with the salt until a foam begins.
Add the sugar very slowly so it absorbs into the whites.
Whip the whites until a stiff but still soft peak forms.
Fold the whites into the pumpkin mixture and carefully lay
out the batter
into the prepared pan.
Bake for 20-25 minutes. It will rise a bit and then fall
when it cools. Don’t be alarmed. This is a soufflé and it will fall. The goal
here is to create enough structure in the egg whites that it doesn’t fall
completely but leaves a nice ½” thick cake to roll up with whipped cream.
The cream filling:
1 ½ cup heavy whipping cream
¼ cup powdered sugar
2 T. dark rum
Whip the cream with the sugar and rum until stiff peaks
form.
Lay the soufflé out on plastic wrap with powdered sugar
sifted on it so it doesn’t stick.
Spread the cream over in an even layer.
On the long side of the cake nearest to you, begin to roll
the cake up using the plastic wrap. Start by folding the end up in a tiny roll
so it makes it easier to roll the cake up. Wrap it in the plastic, refrigerate
for several hours and serve with powdered sugar sifted over top.
This can be made a day ahead and left in the refrigerator until service. It has all the flavors of the holiday without the heaviness.

This was my Mom's favorite pie in the 50's and I now see it re-emerging from the past. If you have not tried it I suggest you do... what a surprise. So light and airy but still very traditional. No one will be disappointed with this slight change in tradition!
This pie is not baked but cooked on top of the stove. Gelatin is added so it is NOT a vegetarian pie but if you make it one day ahead and leave it in the fridge it will have a perfect consistency.
The cream can be flavored with cinnamon or nutmeg or just lovely vanilla. Your choice!
Pumpkin Chiffon Pie
1, 9” deep dish pie plate
Instructions
Graham
Cracker Nut Crust
Combine 1-3/4 cups fine graham cracker crumbs
1/4 cup finely chopped walnuts
1/2 teaspoon cinnamon and
1/2 cup melted butter
1/4 cup finely chopped walnuts
1/2 teaspoon cinnamon and
1/2 cup melted butter
1.
Melt the butter and pour it over the crumb/
nut mixture and with your hands rub it in until the crumbs and moist and hold
together when you squeeze them in your hands.
2.
Place all the crust in the pie pan and begin
pressing up the sides of the pan. When the sides are covered in a tightly
pressed layer then press the bottom down. If you have too many crumbs don’t try
to use them or your crust will be too thick and make this light pie much
heavier. Instead wrap them well and freeze them for another pie.
3.
Bake your crust for 5 minutes in a 350°F
to set the crust.
4.
Let cool before adding your filling.
Pumpkin filling
1 T gelatin bloomed in ¼ cup cold water
½ cup brown sugar
½ tsp. salt
½ tsp. nutmeg
½ tsp. cinnamon
¼ tsp. ginger
1 ¼ cup canned pumpkin
2 egg yolks
1 ¼ cup evaporated milk
- Place
all of the above ingredients into the top of a bain marie or double boiler
and cook about 10 minutes until it mounds on a spoon or holds a ribbon.
- Take
off heat and add softened gelatin stirring until dissolved.
- Cool pumpkin mixture.
2 egg whites
¼ cup sugar
- On
an electric mixer whip the egg whites until foam begins to form and then
slowly pour in the sugar.
- Whip
until stiff peaks form being careful not to over whip to dry peaks.
- Fold
whites into the cooled pumpkin mixture and pour into prepared and
pre-baked pie crust.
- Let
set up in refrigerator for at least an hour and then ice with sweetened
whipped cream.

Rustic Apple
Cranberry Tart
Cream Cheese Pie dough: (two 10” tarts)
12 oz. room temperature unsalted
butter
12 oz. room temperature cream
cheese
1 tsp.salt
1 tsp. lemon juice
14 oz. AP flour
Make the dough:
In a bowl of an electric mixer
cream together the butter and cream cheese until they are well blended. Add the
salt and lemon juice and then the flour. Mix only until blended. Do not over
mix. Wrap with plastic wrap and refrigerate for 2 hours or overnight.
Apple cranberry filling for two tarts:
4# golden delicious or granny smith apples (before peeling and
coring)
6 oz dried natural cranberries
3 Tbl. Cornstarch
6 oz. sugar
2 tsp. Cinnamon!
½ tsp. allspice
2 oz. butter melted
Make the filling:
Peel, core and slice the apples rather
thin. Place them in a large bowl with the cranberries and add the flour, all
but one TBL of the sugar, allspice, vanilla and melted butter. Toss until all
the fruit is covered.
Assemble the tart:
Roll the dough out into a 14” circle and
about 1/8 of an inch thick.
Mound fruit
mixture in center of dough, leaving 3-inch border. Fold dough border over
fruit, pleating loosely and pinching to seal any cracks. Bush dough with beaten
egg. Sprinkle dough with 1 tablespoon sugar.
Bake tart until crust is brown and filling bubbles, about 45 minutes.
Transfer baking sheet to rack and cool tart slightly, about 20 minutes. Slide
metal spatula under all sides of crust to free from parchment. Using large tart
pan bottom as aid, transfer tart to platter. Serve warm or at room temperature
with vanilla ice cream. AND last but certainly not least my very very wonderful Maple Bourbon Pecan pie which, by the way, does not have any CORN SYRUP in it! YAY!
It is by far the very best pecan pie I have ever had the pleasure to eat!
I love this pie but have always hated the corn syrup part which is what make it too sweet and very sticky in your mouth.
This pie will be neither! Perfectly sweet, nutty and with a touch of Bourbon which makes is very Southern. I think you will never make another recipe when you make this one!

Maple Pecan
Pie with Bourbon
Ingredients:
1 1/2 cups pecans
1 cup brown sugar
2/3 cup maple syrup
1 tablespoon bourbon (optional)
1/4 cup unsalted butter
3 large eggs (lightly beaten)
1/4 cup heavy cream
1 teaspoon vanilla
1 teaspoon salt
1 pie crust (chilling in the fridge until used)
Directions:
1. Bake the pecans in a preheated 350F until nicely toasted,
about 8-12 minutes.
2. Heat the sugar, syrup, bourbon and butter in a large saucepan
until it boils, stirring constantly.
3. Remove from heat and let cool.
4. Beat in the eggs, cream, vanilla and salt.
5. Spread the pecans over the bottom of the pie crust.
6. Pour the liquid mixture into the pie crust.
7. Bake in a preheated 350F until a toothpick inserted into the
center comes out clean, about 40-50 minutes.