

Here we go, but keep in mind two things... one I am icing a styrofoam dummy cake, and two I am using a huge tip for demonstration purposes. You should be using a #21 or any small star tip in the 20-30 number range.


Icing the cake is probably the most difficult part of cake decorating. You must learn to properly use the icing tools. Whether you prefer the icing spatula or the icing blade. It takes the proper amount of pressure to get a smooth and even icing. When applying the icing you want to use a firm pressure but when smoothing you lighten up on the spatula. Use the tip of the spatula to apply and then the edge to smooth. Even if you switch to the icing blade the slanted edge will give you the smooth surface you want.


Once you have a smooth and even icing you need to be able to pipe consistent boarders. This takes practice using the piping bag and tips. Here I will show you how to use the star tip in several ways.
Holding the bag properly will help you get consistent piping.

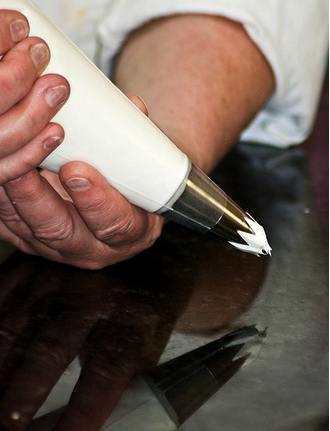
Never fill your bag more than half full! Twist the top of the bag tightly and hold the twisted top between your thumb and first finger then wrap the other three fingers around the ball of icing at the top of the bag. Squeeze from the tips of your fingers to the palm of your hand. With the opposite hand guide but do NOT squeeze as you pipe out your design. Keep the bag twisted tightly as you use up the icing.


I have twenty some photos so I am going to write this blog is sections so you can choose which one is best for your level. Next I will post reverse shell, rosette, and e-motion. Then the last one will be putting these to use on the edge of your cake! Stay tuned!
1 comment:
It looks sooo easy here! I always have problems with my hands - they're shaking, awrr!
Post a Comment